Lucky me, last week I got to go to the world's coolest summer camp!
As part of the University of Alberta's
Residential Interiors certificate program (which I'm still gradually completing), they are offering a handful of courses as one-week intensives (instead of a weekly evening class), including
Surface and Textile Design. Our instructor for this very hands-on studio course was fibre artist
Lesley Stafiniak. We learned wet-felting, needle-felting, shibori, batik, and silk-painting techniques, watched a documentary about natural dyes, and discussed pattern creation techniques. My mind is still buzzing with all the possibilities.
For the projects we painted onto silk habotai, we used Procion H and gutta as the resist. The yellow didn't want to stay in solution, so all our colours were a bit off after steam-setting and washing. Here are my three silk projects: a colour wheel, a mandala drawn from scratch using tracing paper, and a repeat pattern. Other students did gorgeous, inventive work for their repeat patterns, but I wanted more time for my other final project, so I used a folk pattern used in hooked rugs that I could draw in my sleep instead.
 |
My colour wheel before steaming and rinsing.
The pencil marks will wash out eventually. |
 |
| My notes on sketch paper - the process felt like titration, only of colour instead of pH. |
 |
My mandala turned into a spiderweb, complete with a spider in grey gutta in the centre.
My alcohol dewdrops didn't quite turn out, because I had let the dye dry before adding them.
The texture you see around the outside is salt - this is before steaming and washing. |
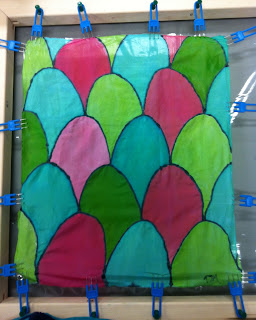 |
| My lamb's tongue pattern, drawn in the traditional way by tracing around the toes of my shoes. I used black gutta for this one. After painting, before steaming and washing. |
 |
| After steaming and washing - see how the lime green turned to mint? By this time I knew the yellow would wash out, so I'd colour planned it accordingly with my daughter's wardrobe in mind. |
My favourite work from the course was shibori, done with synthetic indigo on cotton pima. I was able to bring some extra cloth (a bedsheet) from home to do some extra pieces to exhaust the baths. Here are a few of the photos I snapped with my phone during class:
 |
Synthetic indigo in its reduced state, before adding to the final vat.
It needs to be reduced to be water-soluble and bind to the cloth. |
 |
| Arashi (pole-wrapped and bound) using ikat tape. |
 |
| After unwinding the sample from the pole. |
 |
| Ori-nui using quilting thread. It needs to be really tight to get bite-marks. |
 |
| Finished ori-nui sample. |
 |
An attempt at sekka (snowflakes) using triangular folds and elastics around the corners,
on one of my exhaust-bath experiments. Didn't quite work but I like the pattern. |
 |
The kumo (spiderweb) pattern, scaled way up using a large marble and ikat tape.
This exhaust-bath experiment was repeated for the top third of my final project. |
 |
This is my final project coming out of the second dip.
That yellowish-green you see is the indigo oxidizing before our eyes. |
 |
| My final project after three dips, before unbinding. |
 |
Unbound, and the top third capped (not properly) and stitch-resisted (not tightly enough)
before a single dip of just that part of the cloth. |
 |
Completed final project.
Ne-maki, itajime, ori-nui, mokume, and tsujigahana techniques are all represented.
When I get it back, I'll embellish it with a bit of embroidery. |
You'll notice that none of the indigo samples went really dark - to get that, you need more dipping and drying between dips than we had time for during the course. I also made the rookie mistake of machine-washing and -drying some of my samples, and they lost a fair bit of contrast as a result.
PS: I have many more samples than are shown in these photos. My plan is to vat dye another couple of cut-up bedsheets, then piece them back together to create a sampler quilt. (Now that our queen bed is only used for guests, we don't need all that bedding, so this is a great way to creatively repurpose it for use on a king-size bed!)


No comments:
Post a Comment